
You’ve set up your account, gathered items, and learned how postage works. Now it’s time to create your first listing — the moment your selling journey truly begins.
This part walks you through every step, from choosing the right category to writing a title that attracts buyers.
Step 1 — Choose the Right Category
When you click “List an item”, eBay will suggest categories automatically. Always check they match your item — buyers often search by category.
If unsure, search similar items and copy the category they use. Example:
- Trainers → Clothes, Shoes & Accessories > Men’s Shoes > Trainers
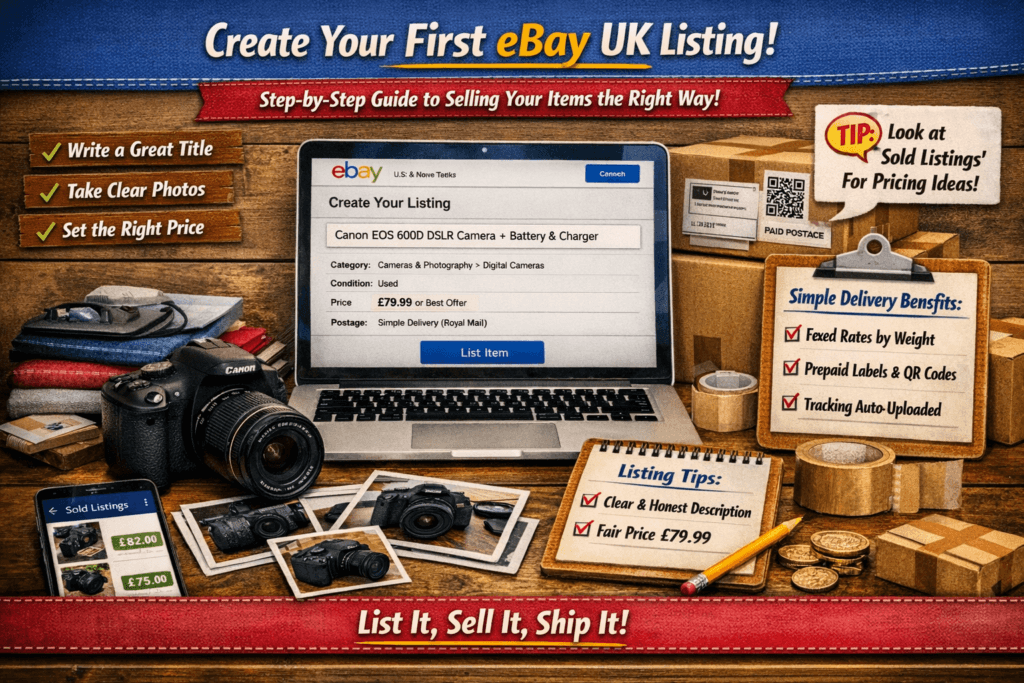
- Camera → Cameras & Photography > Digital Cameras
Correct categories help your listing appear in the right searches.
Step 2 — Write a Clear, Search‑Friendly Title
Your title is the most important part of your listing. It’s what buyers see first — and what eBay uses to match search results.
Use keywords buyers would type, not fancy descriptions.
Example:
“Canon EOS 600D DSLR Camera Body + Battery & Charger”
Avoid filler words like amazing, great, or bargain. Stick to brand, model, size, colour, and condition.
Step 3 — Add High‑Quality Photos
Buyers trust listings with clear, honest photos. Use natural light and a plain background. Show all angles — front, back, sides, and any flaws.
Tips:
- Minimum 3 photos per item
- Avoid filters or heavy editing
- Include close‑ups of labels or serial numbers
If you’re selling bundles, photograph everything together and then individually.
Step 4 — Write a Helpful Description
Your description should answer questions before they’re asked.
Include:
- Condition (new, used, refurbished)
- Any marks or defects
- Dimensions or sizes
- What’s included (charger, box, manual)
- How quickly you’ll post
Keep it friendly and factual. Example:
“Used but in good condition. Minor scuff on lens cap. Fully tested and working. Sent via Royal Mail Tracked 48 within 24 hours.”
Step 5 — Set a Fair Price
Check Sold Listings for similar items. If you’re unsure, start with Auction format — it helps gauge demand.
For items with predictable value (like branded trainers or electronics), use Buy It Now.
Tip:
- Auctions: good for clearing clutter fast
- Buy It Now: better for steady profit
Step 6 — Choose Postage (Simple Delivery)
If you’re a private seller, Simple Delivery will handle postage automatically. Just confirm the correct weight band and courier preference (Royal Mail, Evri, InPost, Yodel, DHL). You’ll receive a prepaid label or QR code once the item sells.
Step 7 — Review and Publish
Before clicking List Item, double‑check:
- Title and category
- Photos and description
- Price and postage
- Return policy (recommended: 15 days, buyer pays return). Please note, buyer only pays for returns if the return is not your fault. If the buyer selects, reason for return, Not as Described, or Faulty etc, you will pay.
Then click List Item — and you’re live!
Step 8 — Respond Quickly to Buyers
Buyers may message with questions. Reply promptly and politely — it builds trust and helps feedback.
Once sold, package securely and post within your handling time. Once you complete the postage label, your item is automatically marked as dispatched. Make sure you post or it is picked up as soon as possible.
Your Action Step Before Part 7
List one item today — even if it’s small. The goal isn’t profit yet; it’s confidence. Once you’ve completed your first sale, you’ll understand the rhythm of eBay selling.


