
Step by Step Guide
3D printing doesn’t have to be complicated — especially when you’re using The HUB Idea Maker to generate your own custom 3D models. This guide walks you through the entire process, from typing your idea to printing the final object. Because the Hub Idea Maker generates JSON prompts from you basic description, you can use this with AI for 3D printing.
You don’t need CAD skills. You don’t need technical knowledge. You just need your imagination.
Let’s get started.

Step 1 — Open The HUB Idea Maker
When you open the Idea Maker, you’ll see a simple box where you can type your idea in plain English. This is where the magic begins.
Step 2 — Describe the 3D Object You Want to Create
In the text box, describe your object clearly. The more detail you give, the better the model.
Here’s what to include:
✔ What the object is
“A keychain shaped like a carp.”
✔ Dimensions
“7 cm long, 3 mm thick.”
✔ Features
“A 4 mm hole for a keyring, smooth edges.”
✔ Style
“Cute and slightly cartoonish.”
✔ Print‑friendly notes
“Flat bottom so it prints easily.”
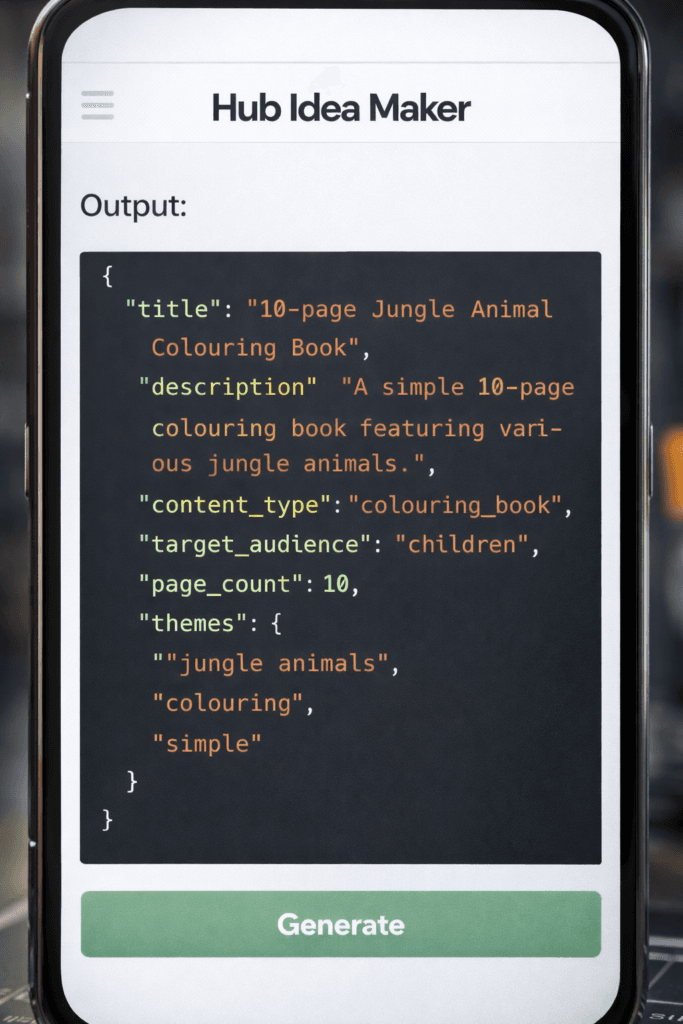
Step 3 — Let The Idea Maker Generate the JSON Prompt
When you click Generate, The HUB Idea Maker turns your plain‑English description into a clean, structured JSON file. This JSON acts as the blueprint for your 3D model — it tells the AI exactly what shapes, sizes, holes, curves, and features to build.
Step 4 — Paste the JSON into Copilot (or your AI tool)
Copy the JSON and paste it into Copilot or any preferred AI platform, other brands are available, with a simple instruction like:
“Create a 3D‑printable model from this JSON using OpenSCAD.”
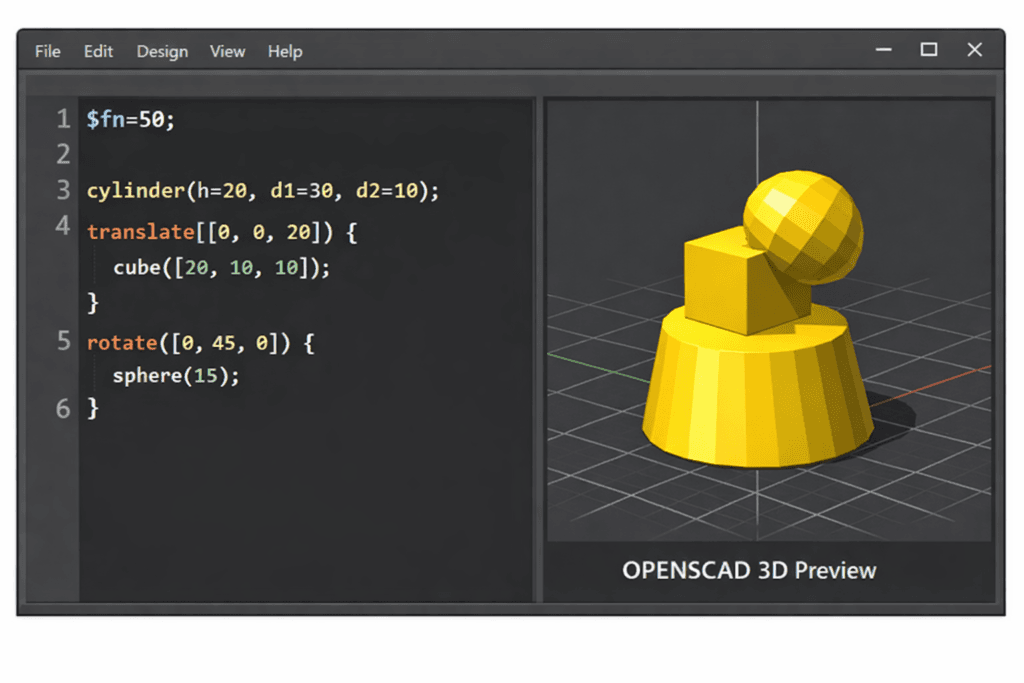
Copilot will then generate OpenSCAD code. This is normal — OpenSCAD is a code‑based 3D modelling tool that’s perfect for turning structured descriptions into real geometry.

Step 5 — Open the Code in OpenSCAD
If you’ve never used OpenSCAD before, don’t worry — it’s free, lightweight, and designed for beginners.
- Download OpenSCAD (Windows/Mac/Linux)
- Open it
- Paste the code Copilot gave you into the left‑hand panel
OpenSCAD will instantly show a 3D preview of your object on the right.
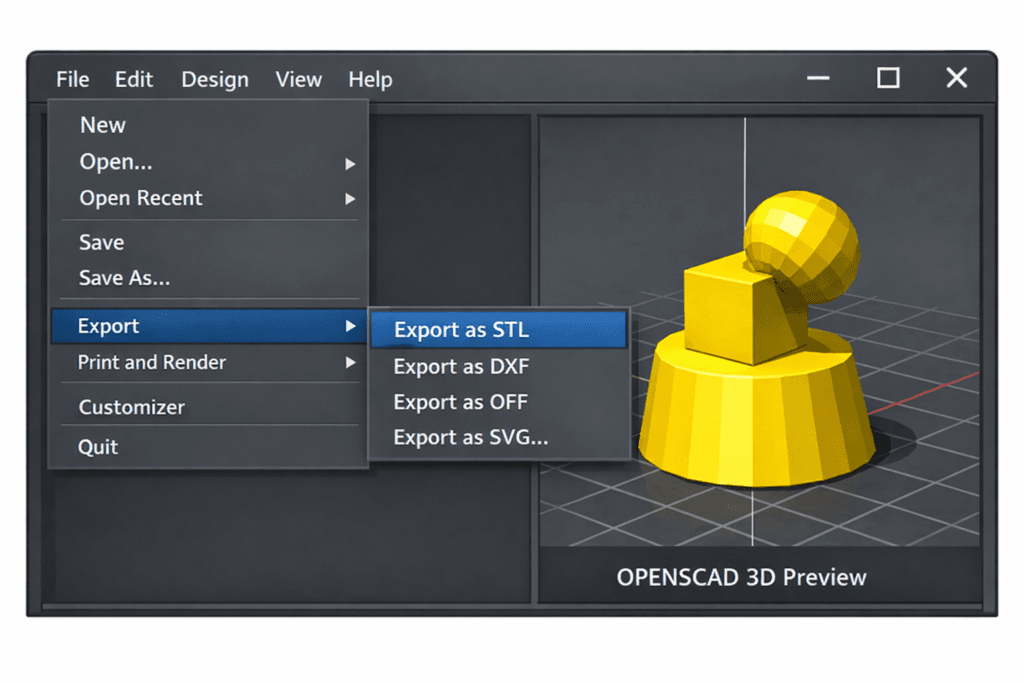
Step 6 — Export Your 3D Model as an STL
Once the preview looks right, export it as an STL file:
File → Export → Export as STL
This STL file is the universal format used by all 3D printers and slicers.
Step 7 — Load the STL into Your Slicer
Open your slicer (Cura, PrusaSlicer, Bambu Studio, Creality Print — any will do) and import the STL file.
You’ll see your model appear on the virtual print bed.
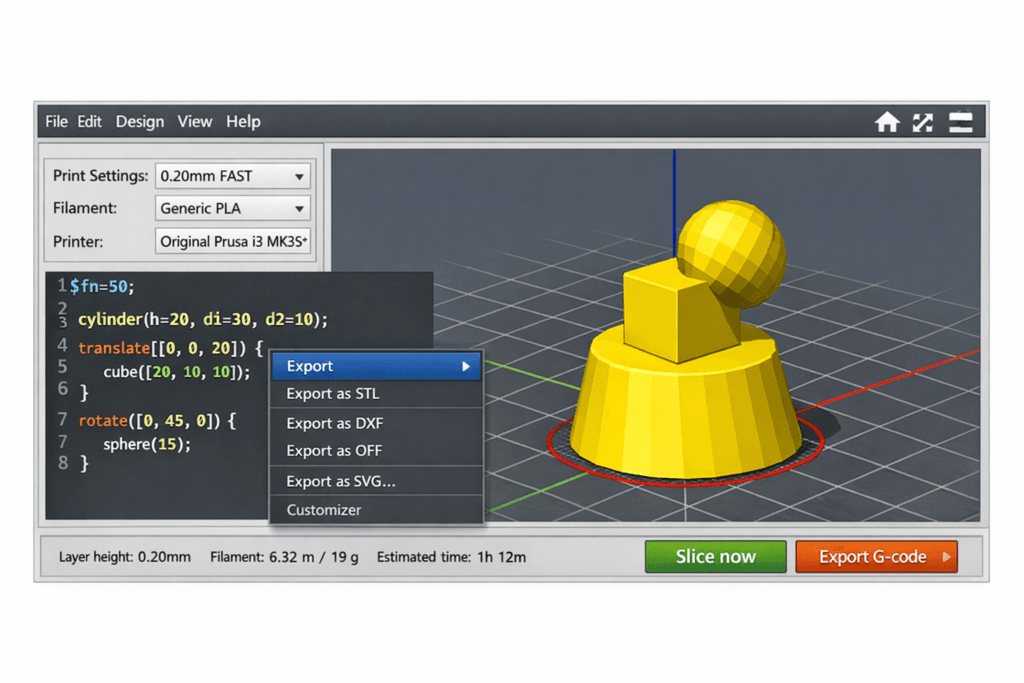
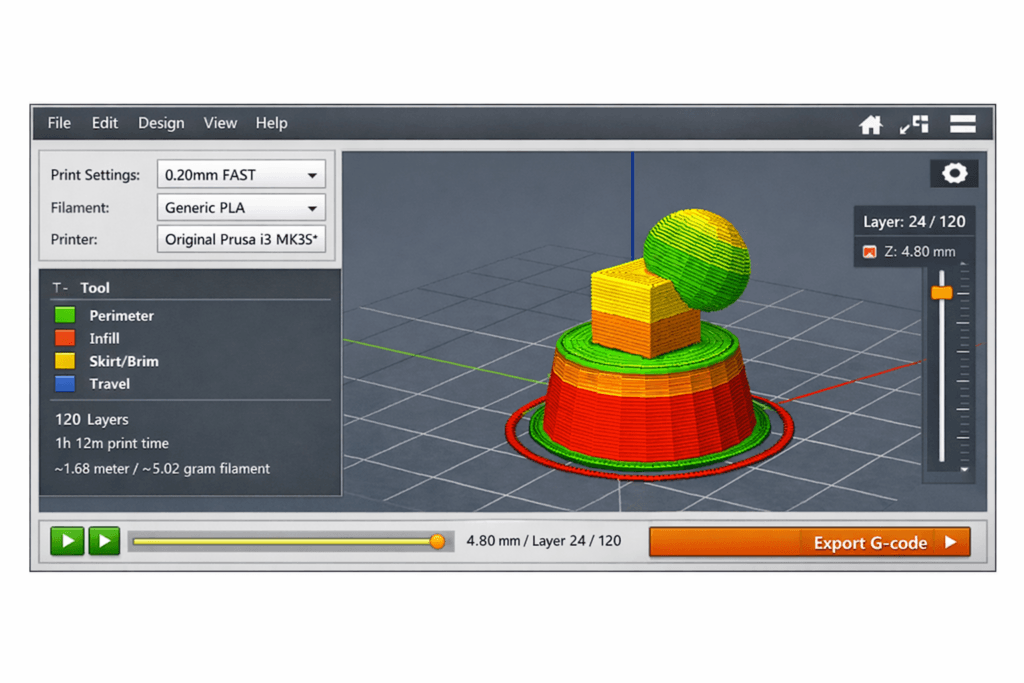
Step 8 — Slice the Model
Click Slice to convert the STL into G‑code — the step‑by‑step instructions your printer follows.
Your slicer will show:
- Layer preview
- Estimated print time
- Material usage
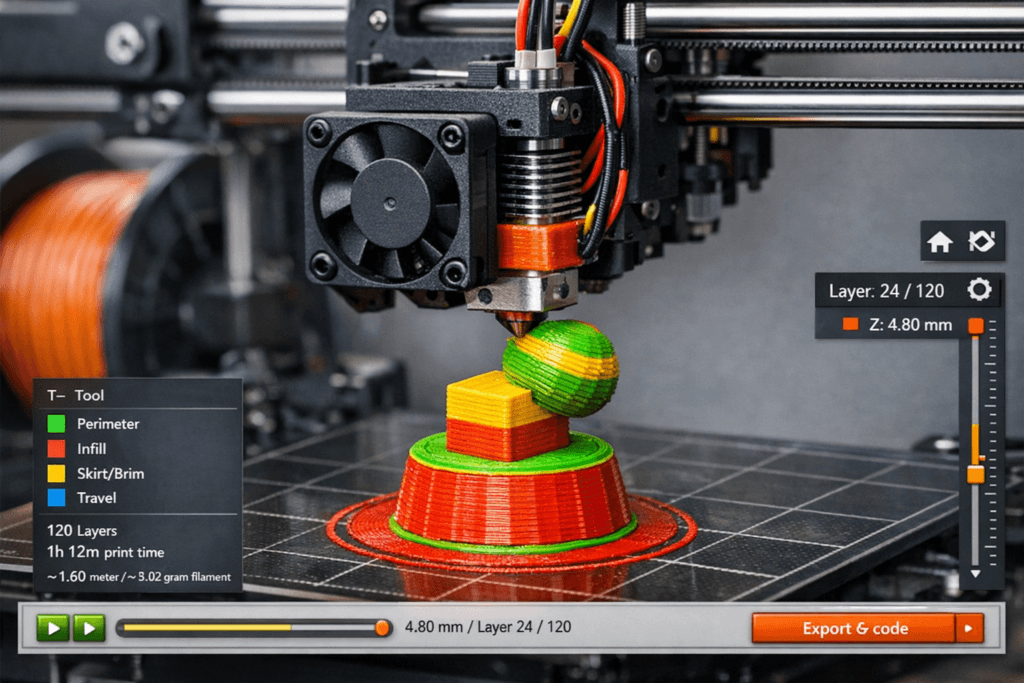
Step 9 — Send the G‑code to Your Printer
You can send the file to your printer via:
- SD card
- USB
- Wi‑Fi (if supported)
Press Print, and your creation begins to take shape.
Why This Workflow Works So Well
This approach keeps everything simple and universal:
- The Idea Maker handles the creative description
- Copilot turns it into OpenSCAD code
- OpenSCAD turns that into a 3D model (STL)
- Your slicer turns the STL into G‑code
- Your printer does the rest
No CAD skills. No technical headaches. Just imagination → JSON → model → print.


